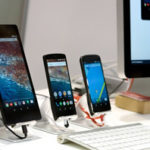
You can connect your canon printer to Wi-Fi to print documents from your Android phone, iPhone, computer, etc.
How to Easily Connect Canon Printer to Wi-Fi
If you are looking for how to easily connect a canon printer to Wi-Fi, so that you can conveniently print documents from your iPhone, Android phone, or computer, then this post will show you how to successfully do so.
Read on:
The world continues to undergo unprecedented transformations. This is as a result of the need to make work easier and more flexible.
As time passes, there is always the need for things to change, ranging from mechanical method of doing things to semi-mechanical, to electrical and down to automated mode of operation.
This is the information age!
Over the years, there has been a huge need for a lot of stuff to be done wirelessly. This is where technology displays its beauty.
Technology has made giant strides over the years to meet up with the ever upsurge for more flexible means of processing information from anywhere in the world.
Now, how do you connect a Canon printer to Wi-Fi?
A typical computer comprises of Input, Processing, Output, and Storage devices. The two most notable output devices remain the Visual Display Unit (VDU) and the Printer.
The quality of printers has evolved over the years due to increase in the taste and desire for more qualitative and flexible printing activities.
Steps to Connecting a Canon Printer to Wi-Fi
Have you ever thought of the possibility of doing your printing work using a Wi-Fi connection?
It is a real possibility and hence the essence of this article.
At the end of this article you will be able to know how to connect your canon printer to a Wi-Fi network to help do your printing work.
In order to make this write up more explicit, we will use the PIXMA MG3250 as a reference canon printer. This is because it is one of the most popular canon printers obtainable.
Secondly, to connect this printer to a Wi-Fi, a router or a hub with a WPS (Wi-Fi Protected Setup) button will be needed. Once this is done, we will proceed to set up properly.
Here are the two methods you can take:
WPS connection method
There are two things to do to ensure the success of this method include making sure that the Router or hub has a physical WPS button available. This is found in the user guide of the router.
Secondly, ensure your security protocol is set as WPA or WPA2.
So here are the steps for this method:
1. Once the printer is on, hold the maintenance button for about 5 seconds. Once done, LED light is flashed.
2. Press (Fit to Page) button.
3. The next is to press the WPA button. Once this is pressed, LED flash is seen indicating that the printer is searching for Wi-Fi network.
As soon as the printer connects to the network, the LED lights up for about 3 seconds, then down to 1 to show connection completion.
To be sure of the connection, you can print out the network settings of your printer. To do this, follow these steps:
1. Ensure the printer is still on
2. Feed the printer with an A4 plain paper
3. Press the button (A) which is the maintenance button repeatedly until the LED shows up
4. Press the black button to print.
Standard USB connection method
1. Insert the software that came with your printer into your computer CD-ROM slot to load. Alternatively, you can download the software from the Internet and install in your computer
2. Once the CD loads, click on Next
3. Choose your mode of connection which is (wireless connection)
4. Check if the printer is on, if yes, then click Next
5. Click on Connect to Network
6. Press and hold the button A for up to 5 seconds, then click on Next
7. Select Wireless Setup using the USB cable
8. After that, select your region when it appears on your screen and click on Next
9. Select your language and click on Next
10. Select the software you want to install on the Next screen pop up
11. Click on Yes to agree to user license agreement
12. Connect your printer to your computer using the USB cable
13. Your printer will be detected by the computer. Click on the printer name to connect
14. Click ok to finish.
This is a longer method. However, it is necessary to have this knowledge in case the first method proves difficult or does not work.
So with these steps you can connect your canon printer to your WIFI.
Conclusion
This article shows how you can connect a canon printer to Wi-Fi. There are two methods presented to provide you with more than one approach in the event one method does not work.
|
Managing your android phone and other devices has never been this easier! Discover best software tools that help you to:
Check them out here:
Amazing android
device manager. |

Featured Video:
Steps to Connecting your Canon Printer to Wi-Fi Router or Network
If you are looking for how you can print document from your Android phone, computer, iPhone, etc. using your canon printer wirelessly by connecting your printer to Wi-Fi network or router, then watch this video.
Discover solutions to various issues you may be having with your smart phone: 7 Best Android Phone Manager Software tools
Related Posts