on Mac by taking a few steps.
How to Easily Burn Video DVD on Mac in Few Steps
Learning how to burn our videos on DVD, especially for Mac users, is one way you can eventually free up storage memories on your Mac OS.
There is no doubt that many of us love movies and video clips a lot. Without doubt, video clips and movies probably take the largest space in our computer storage systems.
Having the knowledge of how to burn these videos on DVD will help you have an extra copy of your movies or video clips just in case you lose them or the movie files get corrupted.
In this article, we will look at how you can easily burn movies and videos on your Mac computers.
If you have been looking for ways to get this done, this article will give you a step by step approach of getting your videos burn to DVD with your Mac OS by making use of third party DVD creator software such as iskysoft DVD creator and Wondershare DVD creator.
Burning Video DVD on Mac Using iSkysoft DVD Creator
ISkysoft is one of the best DVD burning software for Mac computers.
This software comes with different feature such as ability to burn videos with output formats including MP4, DAT, MKV, M4V, 3GP and MPEG.
Using the inbuilt editing software in iSkysoft you can equally edit your video to your liking.
Here are the various steps to burn video DVD on Mac using ISkysoft:
Step 1: Import videos to iSkysoft
If you don’t have iSkysoft DVD Creator software installed, you will need to download and install the software.
Once you are done, launch the software and click the ‘create new project’ button on the interface of the software.
Then click the add button to add the videos you will like to burn to DVD on your Mac computer.
You can equally do this manually by dragging and dropping the videos to the iSkysoft interface.
Step 2: Edit video if you like
You have the freedom to edit the added video before burning in iSkysoft interface.
You can edit the video by cropping, trimming, and adjusting volumes. You can also add a DVD menu to the videos you want to create.
Step 3: Burn DVD
Once you are done editing the video, click the ‘Burn’ button to start burning the videos on the inserted blank DVD on the disk drive.
However, you will have to choose appropriately between the four available output options, including ISO files, DVD folder, DVD Disc, DVD media file.
Since you want to create a DVD disc, you will have to choose the DVD disc option.
Then set the right parameters for the DVD name, burning speed, and TV standard.
The software will eject the disc once the burning procedure is completed.
Burning Video DVD on Mac Using Wondershare DVD Creator
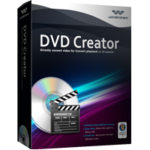
Wondershare DVD creator is no doubt one of the best DVD burning software available on the market today.
Wondershare can be used to burn almost all types of video files to DVD.
It also has good customer support. You can use this software to burn your Video to DVD on your Mac computer.
To achieve this, take the following step below:
Step 1: Install and run Wondershare on Mac
The very first step is to download and install Wondershare (Mac version) on your Mac computer.
Once you are done, install and launch Wondershare.
Click on the ‘create new project’ button to begin new project.
Step 2: Add and edit videos
Click the “+” Icon on the interface of the software to add the video file that you want to burn to DVD on your Mac computer.
You can also drag and drop the videos on the interface of Wondershare manually.
When you are done adding the video, you can click on the video editing icon to edit the video.
Make the changes you want to the video such as cropping, trimming the video, and adding watermark, and click ok once you are done.
Step 3: Select your desired template
Click on the DVD menu template on Wondershare interface to choose from almost 100 different templates to create your DVD.
Click the icon to make the desired changes you want from the template such as changing the background image, adding music and other adjustments.
Step 4: Preview and burn DVD
Once you are done with the editing, you can preview the created video by clicking the preview button, if you are okay with the video, you then click on the burn tap.
Choose the burn to disc option and give the disc the required parameters.
Afterwards, click on burn to start burning video to the DVD on your Mac Computer.
Also, note that you will have to buy an external disc drive to insert the blank DVD in case your Mac computer does not have an inbuilt one.
Conclusion
Burning your video files to DVD on your Mac computer is a good way to back up your video files.
Also, having the knowledge of how to do this can help you safe up space on your computer storage by having most of your videos burned to a DVD disc.
|
Are you looking for software tools to help you create DVDs from your videos, music, or photos? If your answer is yes, then you need to check out the best seven of such software tools that we have selected for you.
Check them out here:
Amazing DVD Creator. |
Related Posts
 7 Best DVD Creator Software to Make Your Perfect DVD


