How to Easily Convert 8mm Film to Digital
This post provides exhaustive information on how you can easily and quickly convert your old 8mm films into digital formats and retain the quality of the videos.
Please, read on:
8MM films were a thing in the past, like VHS and even super 8 films. All of these were a means to save old home movies and lovely memories.
Of course, there are people who still have 8mm players with which they can enjoy their old home movies; nevertheless, this is gradually becoming uncommon.
These days, the 8mm films get stacked up in boxes and put away, gathering dust.
Now there is a dilemma, the boxes are taking up space, and the tapes are getting damaged, but you would give anything to still keep those videos somehow.
So, what do you do when you do want to eat your cake and have it? Is it even possible?
The good news is yes!
You can convert your 8mm films into digital files instead.
This way, you do not have to worry about how much space they’re taking up in your home, and at the same time, you can access them with your devices – computer, Android phone, iPhone, Xbox, and others.
Following through with the conversion process yourself will save you a lot of money and you still get the same results.
Steps to Converting 8mm Film to Digital
Here’s how to convert your 8mm films to digital files:
Step One: Record the film with your camera
The most cost-effective and easiest way to convert your 8mm film into a digital file from the comfort of your home is by recording with a digital camera.
If you do not have a digital camera, you can rent one, purchase one, or find someone you know who has a digital camera.
To begin, get a wall (must be smooth and white), a tripod for the digital camera, a table, an 8mm projector, and an environment with low light.
Set the projector and the digital camera in an environment with low light.
The camera should be placed beside the projector and kept about five feet from the wall. It depends on the kind of 8mm projector you will be making use of.
Step Two: Fit the digital camera in the frame
After setting up, put on the projector and make sure the camera fully projects in the frame.
To make sure the camera is properly set; try moving the camera backward or forward so that it fits the whole image in the frame.
You can also zoom if you’re trying to fit the camera properly, although this may end up blurring the images.
After fitting the camera in the frame, begin the recording and start the video so that the video starts getting recorded.
Step Three: Import the 8mm film you have recorded to your computer
After the film is recorded, the next step is to import it into your Computer.
To do this, connect your camera to your computer or take the memory card out of the digital camera and insert it into the computer.
After connecting, search for the storage device, and the video file in it. Save the video to your computer.
Step Four: Download a video conversion software tool
Converting your 8mm film to a digital file can easily be done with a video conversion software tool.
One of the easiest software tools to work with is Wondershare Uniconverter (formerly Wondershare Video Converter Ultimate).
The software supports thousands of audio and video formats, including AVI, WMV, MP4, WMV, MOV and so much more.
Wondershare also has features that allow you to edit your video files.
To use Wondershare Uniconverter, download, install, and launch the software.
After launching, click on the ‘Add files’ option and choose your recorded 8mm film to add it to the software.
You can also choose to add the 8mm film by dragging and dropping the video file directly into the program window.
Step Five: Edit the added video (optional)
This next step is optional and involves editing your added video if you’d love to.
To edit your video file, simply go to the video thumbnail and click on any of the editing options there.
You will find several edit options like adding subtitles, trimming, applying effects, cutting and so much more.
If this step is not relevant to you, you can skip it.
Step Six: Select preferred output format
After you’re done with recording, importing, and editing your 8mm video file, what’s next is choosing your preferred output format.
To do this, search for ‘Output format’ and click on the drop-down button beside it.
There, you will find a video tab and a list of different output formats and resolution options under it.
Choose your preferred digital output format and resolution.
Step Seven: Time to finally convert your 8mm film to a digital file
When you have done everything else, the final step is to convert your film to a digital file.
To do so, click on ‘Start All’; the file starts the conversion process into whatever format you have chosen.
Afterward, you will find the digital video in the finished tab. You can save to a preferred location on your computer or another device via a cord.
After conversion, ensure that your newly converted video is promptly backed up on an external hard drive or with a cloud system, to avoid permanent loss of files.
Conclusion
If you have some old home movies saved in 8mm film and now desires to convert them to digital format, this post provided valuable ideas you can conveniently apply.
|
If you have a need to get a good video converter and you want some help on the one to go for, here are our top seven pick that you can check out
Check them out here:
Amazing Software for Converting Videos. |
 7 Best Software for Converting Videos to Various Formats
Related Posts
 How to Easily Convert Camcorder Tapes to Digital
 How to Easily Convert VHS to Digital
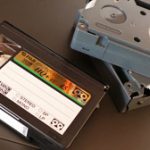 How to Easily Convert VCR to Digital in Simple Steps
 How to Easily Add Emojis to Samsung Android Phone
 How to Easily Uninstall Preinstalled Apps on Android without Rooting
 Sony Playstation 4 1TB Holiday Bundle (Last of Us, God of War, Horizon Zero Dawn)